It’s day 4 of my week of recipe blogging (to make up for the weeks I haven’t had time to write). So it must be time for soup! There’s not many days that go by in the year that I don’t eat soup. Even when the weather is boiling hot (which to be honest in the UK doesn’t happen very often!), there’s still so many soup options, although I have to say I still prefer mine hot rather than chilled. Continue reading “Chickpea and spring greens soup (aka ‘Sludge soup’!)”
Tag: chickpeas
Sweet potato, spinach and chickpea curry
Veggie curries are always on the menu in our house. They can be super quick and easy to make as well as full of rainbow plant based ingredients packed with nutrients and flavour. They are also perfect for using up veggie odds and ends that you don’t know what else to do with, thereby cutting down on food waste. And of course they are easy to make dairy and gluten free.
Whilst in India, I learnt some top tips about prepping for curries that made life easier, as there can be rather a lot of peeling and chopping. That’s where a small blender comes in handy for getting ingredients like onion, ginger and garlic ready – a quick peel, a couple of rough chops, a little tip into the blender pot and a few whizzes later you have a fine dice ready to cook. If you add a little water, you can also 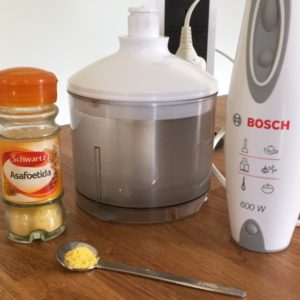 create your own paste, cutting out the need for any oil if you want to go oil free too. And as the veggies are prepped small, they don’t take as long to cook, saving you time. It also makes the sauce smoother, especially useful if you have someone in the house fussy about lumpy bits!
I also discovered asafoetida in India, otherwise known as Hing (which is much easier to say and spell!). This is another India spice commonly used in veggie dishes that has a very pungent and savoury flavour. In fact, if you take a sniff of the pot, it may put you off. But in cooking, it mellows out and adds a depth to the taste of your dish. You can buy it in most larger supermarkets or local Indian stores. And you only need a little, so a pot lasts a long time. It’s really worth a try.
Asafoetida aids the digestive system, as does ginger and cumin, also part of this dish. Add that with the anti-inflammatory properties and general fabulousness of turmeric, this dish is not only wonderfully tasty, but can help the body heal too. That’s even before the impressive phytonutrients found in the sweet potatoes and spinach are looked at.
So why not give this rainbow curry a go one evening and let the flavour soothe your tastebuds and the magic within soothe your body!
Sweet potato, spinach and chickpea curry (serves 4)
1 onion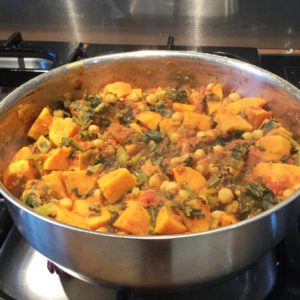
2 cloves garlic
1 red chilli
1 inch piece fresh ginger
a pinch of asafoetida/hing
1/2 teaspoon ground turmeric
3 medium sweet potatoes, peeled and chopped into chunks
400g tin chickpeas rinsed and drained
400g tin chopped tomatoes
200g spinach, washed and roughly chopped
salt and pepper to taste.
Peel the onion, garlic and ginger. Chop a couple of times and put in the bowl of a small food processor. Wash the chilli, deseed and chop a couple of times then put in the pot. Blitz for a few seconds until chopped into tiny pieces.
Heat a large pan on a medium heat and sprinkle the asafoetida on the bottom for a minute until you smell the pungent aroma. Add a little oil or water then tip in the blitzed veg. Sauté for a few minutes until soft and starting to brown – don’t let it burn or the garlic will be bitter. Add the tomatoes and turmeric and simmer for a couple of minutes, then stir in the sweet potato and cover with the tomato sauce. Add a little extra water if needed, but not too much as you want a dryish curry. Turn down the heat, pop on the lid and simmer for 10 minutes. Add the chickpeas and simmer again for another 10 minutes until the sweet potato is cooked. Stir in the spinach, pop the lid back on and simmer for another couple of minutes until the spinach is fully wilted and incorporated.
Season with salt and pepper as needed and serve with some steamed brown rice or chapattis. Enjoy!
Channa masala – dairy free and delicious!
One of the main benefits of living in India was of course picking up top tips on how to make a good curry. Before we left for Bangalore, I had eaten channa masala from an English curry house, but it was buttery and the spices harsh. I’ve since realised that harsh spices are uncooked ones, and a good channa masala can be dairy free and gorgeous!
In case you’re wondering, channa is my old favourite, chickpeas! Known a garbanzo beans in the US, this fabulous pulse is so worth incorporating into your diet wherever you can as they are incredible little nuggets of nutrition. For a start, they are a great source of protein, not complete as the essential amino acid histadine is missing, but when combined with wholegrain rice or flour pack a serious protein punch. On top of that, they have loads of fibre, so not only help to keep you full for long, but can aid in reducing cholesterol levels as well as promote a healthy gut.Chickpeas are also a great source of folate, particularly important for women of child-bearing age, iron, phosphorous, zinc and manganese, which is essential for energy production in the body. They are low in fat but still have essential fatty acids and contain other nutritional necessities such as potassium, vitamin C, calcium and other B vitamins to name a few.
From a financial point of view, chickpeas are also pretty cheap, certainly as a protein source (much more affordable than meat!). Canned are more convenient than dried, although this convenience carries a cost; financially they are more, environmentally there’s the can and nutritionally up to 45% of the folate is lost in the canning process. But then sometimes there’s just not time to soak and cook, even with a pressure cooker at hand!
My channa masala recipe is not really traditional, as it contains more than just chickpeas, tomatoes and spices. As my family will always tell you, I like to add in some extra veg in everything, especially something green!
So top tips for cooking this channa masala are:
* blend the onion, garlic and ginger into a puree before cooking – this gives a smooth sauce and reduces the amount of oil you need and reduces the chance of burning
* add the spices once the onion mix is cooked, stirring well for a minute to help them cook
* add the chickpeas near the end so they don’t over cook – the flavour is in the sauce, not the pulses
* use your nose as well as your tongue to tell when the spices are cooked – the pungent, harsh aroma softens when cooked.
So that’s about it – here’s the recipe. The spice amounts are a guideline only – use less or more depending on how flavoursome you like your curry. Serve with brown basmati rice or wholemeal roti and enjoy!
Channa masala
1 onion roughly cut
3 cloves garlic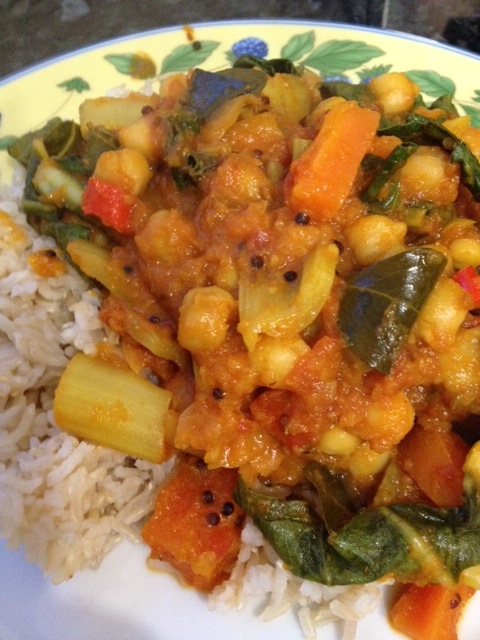
1-2 inch cube fresh ginger
1 tablespoon olive oil
1 teaspoon black mustard seeds
1 teaspoon cumin seeds
1 chilli diced – red or green, its up to you
1/2 teaspoon ground turmeric
1 teaspoon chilli powder
1 teaspoon ground cumin
salt
2 carrots cut into small chunks
400g tin chopped tomatoes
400g tin chickpeas or 1 cup soaked and cooked
spinach or chard, chopped
Put the onion, garlic and ginger into a food processor and whizz until finely chopped/pureed. It becomes pretty smooth and watery. Then heat the oil or water in a pan and add the whole seeds, stirring occasionally. Once they start to pop, reduce the heat and add the onion mixture, stirring constantly so it doesn’t burn. Cook for about five minutes until the fluid starts to reduce, then stir in the other ground spices and salt (I use about 1/2 teaspoon) and cook for a minute or so, stirring constantly. Add the chilli and carrot, covering them with the mixture, then pour in the tinned tomatoes, mixing well, adding a little water to wash out the tin. Your mixture should be a thick stew, not too watery but not too dry. Once boiling, reduce the heat and leave to simmer for 20 minutes or so. Taste to check the flavour and if the harshness has gone, add the chickpeas and cook for 5 minutes, then add the chard or spinach and cook for a couple of minutes more. The curry should now taste rich and delicious, so serve it up and enjoy!
Humdinging hummus
Thank goodness for hummus! Not the usual thing to say, but for me it’s a lunch time saviour. Finding healthy, easy dairy free snacks can be a bit challenging at times, especially when all you want to eat is cheese, but hummus is just perfect. Back in the UK, it was easy to pick up a pot from the supermarket, but over here in India, it’s not available, so I had to learn how to make it myself. Finding tinned chickpeas is not so easy either and cooking them from scratch takes a long time. Then I discovered the joys of a pressure cooker!
There are many noises that I will always associate with India – horns, mopeds, random men shouting “hoy” and the ubiquitous pressure cooker. Early in the morning, and at odd times throughout the day, a symphony of pressure cooker whistles can be heard all around the compound I live in as various breakfast and lunch dishes are prepared. I soon realised that pressure cookers are used so much to save time – Indian cooking involves a lot of preparing from the basics. Boiling items not only takes time, but also energy, and when your gas supply comes from canisters which are rationed, you want to use as little as possible. Two hours of boiling beans until they are tender is out.
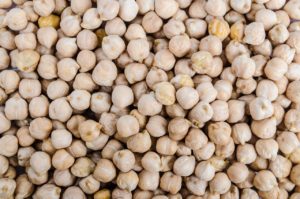 Soaking chickpeas overnight for pressure cooking the next morning has become a way of life. For hummus, not only is this so much cheaper, even for organic goods, but healthier as the tinned version soaks in fluid containing added sugar and salt. The carbohydrates in chickpeas are complex, and so take longer to digest by the body, releasing a smooth flow of energy that lasts some time. Added sugar is refined and is rapidly released, giving your body extra work to do and adding stress. I use the cooking water in the hummus as it contains extra flavour and any vitamins and minerals that may have leeched out from the pulses during cooking, whereas the tinned version I throw it away and so that extra flavour.
If you’ve never used a pressure cooker before, it’s really easy but a bit scary!! Simply place your bean or pulse in the bottom of the pan, add water until their covered plus a little more. You don’t want too much excess fluid in the pan, but equally you need enough so it doesn’t burn dry. Attach the lid until it’s secure, and turn on the heat to a medium level. Once the pressure has built up, it it suddenly whistle and releases a load of steam – don’t stand too close when this happens. Apart from anything else, it’s really loud, but you could get burnt. I usually cook my chickpeas for 10 minutes after the first whistle, then turn off the heat and leave until it’s cooled down. It’s really important not to remove the lid until all the built up steam has dissipated otherwise you will get a nasty burn.
Once the chickpeas are ready, it’s time to whip up your hummus. Packed with goodies, it combines the excellent protein source of chickpeas and the nutritional powerhouse of sesame seeds, the main ingredient of tahini. There’s so much to say about both of these and not room here but be sure to know that both will have their own feature on the blog soon!
The best thing about home made hummus is being able to customise it to how you like it. Shop bought versions can be quite high in fat and tend to contain preservatives and additives. The fat content can be controlled by using less olive oil and more cooking water, or home made tahini that has less added oil into it. The lemon not only added a beautiful sharp flavour but helps release the protein and B vitamins locked up in the pulse. There’s also variety, as mine seems to come out different every time I make it!! So have a play around – don’t be tied to measurements too much and experiment.

Homemade hummus
250 grams of dried chickpeas soaked over night or one tin, rinsed and drained
approx 1/4 cup cooking liquid or water
3-5 tablespoons lemon juice
1 1/2 tablespoons tahini
2 cloves of garlic crushed (or more if you like it strong)
salt to taste
2 tablespoons of olive oil – less or more depending on how much fat you want added
ground cumin to garnish
Put all the ingredients except the cumin and the liquid or water into a food processor. Add a little of the liquid and blitz until you get a smoothish paste. Add a little more liquid if the mix is too dry and blitz again. Stop and check, taste and add more of any of the ingredients (except chickpeas) to customise your flavour and texture. Once you’re happy, place in a serving dish and sprinkle ground cumin on the top. Enjoy with raw veggies, pita or in a wrap. Or just on the end of your finger if you can’t wait!