Wimbledon starts today. Apart from amazing tennis, I always associate this time of year with the start of summer (that box can be checked!) and the beginning of the British strawberry season, as what can be more British than grass-court tennis matched with strawberries and cream? Continue reading “Strawberry delight”
Tag: organic
Veg box challenge
I love getting my Riverford veg box every Wednesday! Unless we’re over run with potatoes or artichokes, I never look at the box contents on line, but wait to be surprised when the box arrives. It might help planning if I checked, but I love a bit of creativity and spontaneity, particularly if there is a vegetable that I’m not particularly familiar with, or that’s not a bit hit with the family. And cooking dairy free, gluten free and plant based just makes the challenge a little more interesting!
I’ve been getting a Riverford organic veg box for a long time now, apart from when we were in India – bit too far for them to deliver! I did, however, find a local one whilst I was there, which presented an even bigger challenge at times.
In my opinion, organic vegetables not only taste better, but being grown more naturally in cared for soil means they contain more nutrients, less chemicals and are better for the environment. And I know that everything grown is as local to the UK as possible, not flown half way across the world, and is therefore fresher and more vibrant.
Yummy parsnip soup
We built a small vegetable patch in the garden this spring, but hadn’t expected to gain much produce in the first year. It rained so much, we started later than planned, so seed sowing was somewhat delayed. Plus we didn’t know what would be a success, and what would not.
Dairy free sour cream
Sometimes I wish I could freeze frame moments so that I can capture the look of incredulity on peoples faces when I tell them that I don’t eat dairy or meat. It’s really quite funny to see and they always ask the same question – so what do you eat? Then when I explain about eating a whole food, plant based diet, a shadow of concern clouds their faces – surely you can’t survive on that?
There’s so many different foods to eat other than meat or dairy, it’s just our way of thinking that makes it seem impossible to not only survive, but to heal, become really healthy and energetic and generally feel much better than before. I guess I am lucky that I have a food intolerance to yeast and not wheat as it makes it much easier – at least I can eat cake! And eating a whole food plant based diet means that when I do have the occasional fried or greasy option, I not only enjoy it but don’t feel any guilt about eating it, as I don’t seem to put on weight any more either!
There are so many different plant foods to try, and a whole array of recipes on the internet, it’s really a new adventure in cooking, which I find quite exciting (sad as it may be!). Plus on top of that, eating this way means I never feel really full and bloated, my chronic itching has stopped and my skin is looking great – in fact a friend said the other day it looked like I’d had botox! Cutting out processed foods and getting all the vitamins and minerals in wholefoods really does make a difference.
But finding dairy free alternatives is still a challenge. This week I experimented with dairy free sour cream, using it as a dressing on a beetroot salad I made for a party we had on Saturday night. It tastes pretty good, and lots of it was eaten, so I guess others thought so too. Obviously sour cream can be used with many dishes – I especially look forward to trying it with a veggie chilli which I’m planning on making later in the week. It is cashew nut based again, as that gives the creamy texture, so apologies to those with nut allergies.
Dairy free sour cream
1 cup cashew nuts
juice of 1 lemon or lime
1/2 teaspoon salt
1/2 – 1 tablespoon olive oil (optional)
Soaks the cashew nuts in water for at least two hours. Drain off this water and grind in a processor into a thick paste, adding a little water. I find I have to grind for 30 seconds or so, then stop, give it a scrape off the edges then grind again. Repeat and grind for a third time, adding water if you need to to get a thick creamy consistency. Add in the lemon juice and salt and blend again until it’s combined. Taste and adjust to how you want it. To make it richer, add the olive oil (but remember this is a refined oil and not a whole food and the fat content will increase). If it’s too thick, add a little more water. Then it’s ready to go!
Beetroot salad
3 or 4 beetroots cleaned (organic if possible)
1 teaspoon fennel seeds
salt and pepper
dairy free sour cream
chopped chives to garnish
Cook the beetroot until soft, but not too soft – I use the pressure cooker to save time, but boiling, roasting or steaming works just as well. Leave to cool. Dry fry the fennel seeds in a hot pan until they start to colour and emit a lovely smell. Turn off the heat and leave to cool. Chop the beetroot into small dice and place in a serving bowl along with the cooled fennel seeds, add seasoning and stir. Place a few good dollops of dairy free sour cream on the top and sprinkle with chives. That’s it – eat and enjoy!
Raw choco-nut energy balls
Last month, I disappear off with a friend for a few days to visit Auroville, an alternative community nestled in the countryside near to Pondicherry on the Tamil Nadu coast. Continue reading “Raw choco-nut energy balls”
Dal or lentil – it’s a name thing
Before I came to India, I thought lentils were either red, puy and occasionally green, and that dal was a soupy kind of spicy dish. Then I went shopping in the local supermarket and discovered a whole array of “dal” with different names, some of those being the same product but hailing from a different part of India and called by the local name.
Just to make it even more confusing, whole lentils tend to be called “gram”, a generic name for pulses, so includes chickpeas and other dried peas I hadn’t come across before – cow pea and horse gram, both of which are really tasty (I have a great little easy cow pea dish I’ll share with you soon). Once the pulse is split, and it’s outer coating shed, the gram becomes a dal, or a lentil, in the right form for cooking dal. Confused? Me too!
I’ve worked out there are four main ‘dals’:
yellow dal: or yellow split peas as I knew them in the UK, or toor/tuvar dal in Hindi. This is split pigeon pea and used most commonly for your standard dal
mung dal which comes from the mung bean, a pale green lentil that has a real earthy look to it. Mung beans are a deep green when whole but paler and flecked with white when split
masoor dal, or red split lentils, the one I am most familiar with
urad dal, which comes from black gram, but is white when split. This is most common in South India and usually soaked and ground to make dosas and idlis, iconic breakfast items.
Whatever the name or colour, dals are really healthy, a tiny powerhouse of nutritious goodies, packed with protein, fibre, calcium, magnesium, iron, potassium and a whole array of B vitamins. Dal is made up of 20-30% protein, better than most meat products but without the saturated fat and cholesterol. It is not, however, a complete protein in the same way as meat. Pulses are low in the essential amino acids (the building blocks of protein) methionine and cysteine. So they should be eaten with another food which is high in these missing amino acids. Traditionally, dal is eaten with rice or some form of bread – chapati, roti etc. Whole rice and whole wheat are high in both methionine and cysteine, but low in lysine, another essential amino acid. Pulses just happen to be teaming with lysine and so dal and rice or chapati is the perfect dish!
Due to their high dietary fibre content, dal/lentils are very good for your bowels, but do have a reputation for creating rather a lot of wind – urad dal is the worst offender apparently, and mung the least and is often given to convalescents as it’s easy on the digestion. I always buy organic dals which are really widely available here, and only a few rupees more than the non-organic version.
The key to a good tasty dal is the tempering – the seeds and spices that are fried separately and then added at the end. If you want a low fat dish, go easy on the oil otherwise it will become loaded with fat. Ghee is often used for the tempering, which gives it a distinctive flavour but is pretty high in fat. Theoretically, ghee is non-dairy, but I’m not convinced so avoid using it at home. I’ve tried various different recipes since I’ve been in India, some more successful than others (dal and the pressure cooker just don’t seem to work for me!). This is my favourite – big fat juicy tomatoes are the key to this dish!
Dal fry/Tarka Dal
1 cup of red split lentils, rinsed well and drained
1 finely chopped onion
2 x juicy tomatoes
1 -2 cloves minced garlic
1/4 tsp tumeric
salt
(lemon juice)
For the tempering:
1/2 tsp cumin seeds
1 tsp mustard seeds
1-2 dried red chilli or 1 fresh green chilli
2 inch piece ginger, julienned
pinch of hing (asafoetida)
handful curry leaves
fresh coriander for garnishing
First, heat a couple of tablespoons of water in a pan and fry the onion and salt for a few minutes then add the garlic and keep stirring until it’s lightly brown. Add the tomatoes and cook for 2 minutes. Add the lentils and turmeric, heat through and add 3 cups (ish) of water – if you want a thicker dal, add less than 3. Cook on a low heat for 20-25 minutes until the lentils are soft and mushy. In a separate pan, heat the cumin and mustard seeds. Once they start to pop, add all the other ingredients except the coriander and cook for a few minutes. Tip the tempering into the cooked lentils, mix together and simmer for a couple of minutes, adding a squeeze of lemon juice to help make the proteins more available, garnish with the coriander and serve with cooked brown rice or some whole wheat chapatis.
Yummy dairy free chocolate brownies
There’s not many people who don’t love a chocolate brownie every now and then, but most of the ones you can buy in the shops have some sort of dairy content, either butter or milk. Most traditional recipes for homemade brownies have the same issue. Of course, if you have some 100% dairy free spread to hand, you can easily substitute this for butter, use a non dairy milk and voila! But when there’s no spread available, there’s a brownie gap in my cake tin!
The other challenge over in India is finding cocoa powder. There is a local brand, but it doesn’t taste very good and tends to be grainy. Cadbury’s cocoa is my favourite, and should be a staple in any dairy free cupboard! Unfortunately, it’s been a good 4 months since I’ve last seen it in the shops, so I was really excited the other day to find a tin and smiled all the way to the checkout, getting a few odd looks from the locals on the way!
This recipe uses oil rather than spread, and still produces delicious, gooey brownies although they can be a little greasy. I’ve tried different oils for baking – coconut oil is supposed to be excellent and does give a great texture but changes the flavour of the brownie. I bought some lovely delicious organic coconut oil recently, made a batch of brownies only to realise the oil had gone rancid really quickly (the downside of coconut oil) and they really tasted revolting. It was very sad to see the brownies in the bottom of the bin! So I now use organic canola oil, but rapeseed or any non-aromatic vegetable oil will do. The raisins enhance the texture, and increase the gooiness inside.
For those of you with egg allergies, try using an egg substitute, and reduce the cooking time as the brownies are drier.
Dairy free yummy chocolate brownie
2 medium eggs
1 cup caster sugar
5-6 tablespoons cocoa powder
1/3 cup oil
3/4 cup self raising flour
pinch salt
3 oz raisins
handful of chopped walnuts (optional)
Place the eggs and sugar in a bowl and mix together well. Add the cocoa powder and oil, and stir well. Add remaining ingredients – use a little non-dairy milk if it’s too dry.
Humdinging hummus
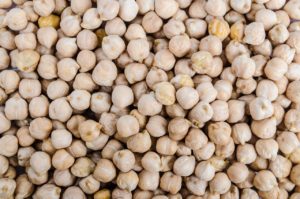
Thank goodness for hummus! Not the usual thing to say, but for me it’s a lunch time saviour. Finding healthy, easy dairy free snacks can be a bit challenging at times, especially when all you want to eat is cheese, but hummus is just perfect. Back in the UK, it was easy to pick up a pot from the supermarket, but over here in India, it’s not available, so I had to learn how to make it myself. Finding tinned chickpeas is not so easy either and cooking them from scratch takes a long time. Then I discovered the joys of a pressure cooker!
There are many noises that I will always associate with India – horns, mopeds, random men shouting “hoy” and the ubiquitous pressure cooker. Early in the morning, and at odd times throughout the day, a symphony of pressure cooker whistles can be heard all around the compound I live in as various breakfast and lunch dishes are prepared. I soon realised that pressure cookers are used so much to save time – Indian cooking involves a lot of preparing from the basics. Boiling items not only takes time, but also energy, and when your gas supply comes from canisters which are rationed, you want to use as little as possible. Two hours of boiling beans until they are tender is out.
Soaking chickpeas overnight for pressure cooking the next morning has become a way of life. For hummus, not only is this so much cheaper, even for organic goods, but healthier as the tinned version soaks in fluid containing added sugar and salt. The carbohydrates in chickpeas are complex, and so take longer to digest by the body, releasing a smooth flow of energy that lasts some time. Added sugar is refined and is rapidly released, giving your body extra work to do and adding stress. I use the cooking water in the hummus as it contains extra flavour and any vitamins and minerals that may have leeched out from the pulses during cooking, whereas the tinned version I throw it away and so that extra flavour.
If you’ve never used a pressure cooker before, it’s really easy but a bit scary!! Simply place your bean or pulse in the bottom of the pan, add water until their covered plus a little more. You don’t want too much excess fluid in the pan, but equally you need enough so it doesn’t burn dry. Attach the lid until it’s secure, and turn on the heat to a medium level. Once the pressure has built up, it it suddenly whistle and releases a load of steam – don’t stand too close when this happens. Apart from anything else, it’s really loud, but you could get burnt. I usually cook my chickpeas for 10 minutes after the first whistle, then turn off the heat and leave until it’s cooled down. It’s really important not to remove the lid until all the built up steam has dissipated otherwise you will get a nasty burn.
Once the chickpeas are ready, it’s time to whip up your hummus. Packed with goodies, it combines the excellent protein source of chickpeas and the nutritional powerhouse of sesame seeds, the main ingredient of tahini. There’s so much to say about both of these and not room here but be sure to know that both will have their own feature on the blog soon!
The best thing about home made hummus is being able to customise it to how you like it. Shop bought versions can be quite high in fat and tend to contain preservatives and additives. The fat content can be controlled by using less olive oil and more cooking water, or home made tahini that has less added oil into it. The lemon not only added a beautiful sharp flavour but helps release the protein and B vitamins locked up in the pulse. There’s also variety, as mine seems to come out different every time I make it!! So have a play around – don’t be tied to measurements too much and experiment.
Homemade hummus
250 grams of dried chickpeas soaked over night or one tin, rinsed and drained
approx 1/4 cup cooking liquid or water
3-5 tablespoons lemon juice
1 1/2 tablespoons tahini
2 cloves of garlic crushed (or more if you like it strong)
salt to taste
2 tablespoons of olive oil – less or more depending on how much fat you want added
ground cumin to garnish
Put all the ingredients except the cumin and the liquid or water into a food processor. Add a little of the liquid and blitz until you get a smoothish paste. Add a little more liquid if the mix is too dry and blitz again. Stop and check, taste and add more of any of the ingredients (except chickpeas) to customise your flavour and texture. Once you’re happy, place in a serving dish and sprinkle ground cumin on the top. Enjoy with raw veggies, pita or in a wrap. Or just on the end of your finger if you can’t wait!
Green gunge – but it’s good for you!!!
One of my dear friends recently lost loads of weight by following a juicing diet. I was sceptical at first – how couldjust drinking juice be good for you. It may be full of vitamins and minerals, but what about the fibre and surely you get too hungry (I like my food fairly solid!) and end up bingeing? But she practically glowed with good health as she dropped 2 dress sizes, so there must be something to it.
Health, whether good or bad, comes from the food we put in to our bodies. Juicing provides extra shots of vital goodies to help our bodies deal with the constant stresses and toxins we are exposed to, both external and internal, although I believe in the long run it’s best to eat the whole food rather than just the juicy parts. But if you want to know more about juicing, including some great recipes and tips on when to drink them, check out this article on the Health Ambition website –https://www.healthambition.com/juicing-recipes-for-weight-loss/.
Our bodies know what we need if we learn to listen to it. Since living in India, I have craved green leaves which must mean I’m low in B vitamins, iron or calcium (not sure which) and have even been known to stir fry cauliflower leaves that are usually discarded just because green leaves are hard to come by. On my recent trip to Kashmir, I came across hak which is grown locally in Srinigar. It’s similar to kale and I couldn’t get enough of it and begged the hotel to serve it to me at every meal, it was so gorgeous. It was sautéed in water along with mustard oil, Kashmiri red chilli, salt and a little local masala, or seasoning. Occasionally a little spicy, it’s deep rich green flavours were just divine!
After attending a healthy eating cooking seminar a few months ago, I discovered green smoothies. Made up of 60% fruit and 40% green leaves, they really are quite delicious and leave you feeling revitalised and full of energy – that’s after you’ve managed to get your head around the fact that the green gunge in the glass is actually something you want to ingest! Spinach is pretty easy to come by here; the little organic grocers stocks some beautifully green bunches, leaves not too big. It tastes pretty strong, much more so than the lovely baby leaves you can by in the supermarkets in the UK, so it’s green hard core from the off. Called palak, it’s not traditionally eaten raw here – my maid was horrified to find out I ate uncooked leaves, and surprised to find out I lived to tell the tale!
Green smoothies can be made with any green leaf as it’s base – spinach, celery or beetroot tops even mint. The key is to vary your intake and not have them every day – raw green leaves contain oxalic acid. Consuming large amounts of oxalic acid can be toxic (you would need a lot of greens every day for this to happen). It binds to metals, such as iron, making it unavailable for absorption in to the body. This therefore means that spinach isn’t a great source of iron in the diet, despite what Popeye might say. However, vitamin C enhances iron absorption, so matching spinach with lemon for example counteracts the negative effects of oxalic acid. And green leaves are an amazing source of vitamin B, calcium and magnesium to name a few.
I’ve featured my favourite green smoothie combination, but you can make up whatever you like. Grind the green leaves in the blender first before adding the other ingredients as the cellulose in the cell walls takes some time to break down.
Spinach, watermelon and banana smoothie
Handful of spinach leaves, thoroughly washed
Big chunk of watermelon
2 small ripe bananas or 1 medium
juice of sweet lime
flaxseed powder (if you want an omega 3 shot).
Place the spinach in the blender and blast on full power until the leaves are broken and mushy. Add in the fruit and juice and blast again until everything is incorporated and fluid – this may take up to 2 minutes depending on the speed of your blender. Sprinkle in flaxseed powder if you are using it and whizz again for a moment. Poor into a glass, close your eyes and deceive your brain as you knock it back. I managed to get my son to try it despite his dubious face – he actually admitted it tasted good but preferred his fresh pineapple juice as it looked more normal!
Vegetable coconut stew
Living in South India is a food adventure; there are so many types of dishes, snacks, fruits and vegetables that I’ve never seen or heard about before. In particular, there’s a whole array of breakfast dishes that I love and eat any time of the day, which may be frowned upon by my Indian friends, but I still struggle with the concept of curry for breakfast! It’s very different to coco pops or toast.
One of my favourites is a vegetable stew, a fantastic vegan dish, which hails from Kerala, so of course it contains my number one ingredient – coconut. It’s not spicy but has a wonderful subtle flavour that still warms the tummy and tempts the tongue. It’s also unusual to have such a white stew with the colours of the vegetable just coming through. I think it looks lovely although I have a friend who it just upsets – he thinks it looks all wrong!! Traditionally it’s served with appams, a type of pancake made from rice and coconut. Preparing the appam mixture is a long process that involves lots of soaking, grinding and fermenting – even the ready made mixture requires 10 hours of soaking so I’ve only ever eaten them in a restaurant, not made them at home. It’s a shame they’re so complicated though, as they are really delicious to taste. Cooked in a small pan, it’s shaped like a bowl which then holds the stew.
Instead of appams, I serve the stew with rice, which still tastes great but has a different texture/taste combination. I used to cook white rice, just because it seemed quicker and there’s always more choice on the supermarket shelves. Brown rice has a bad image; historically only eaten by the poor and more recently by bowel obsessed hippies. But the thing is, the poor and hippies were definitely getting the better deal. Nutritionally, white rice has the same carbohydrate and calorie content, but that’s as far as the similarities go. Brown rice retains the bran and germ layers – these contain the minerals and vitamins which would be used by the starchy endosperm beneath if left to grow. White rice has both these layers removed and is then polished, which removes the bran oil. This is good at reducing LDL fats. Plus these layers contain most of the nutritious goodies such as vitamin B1, B3,B6, iron, selenium and magnesium. White rice stores better than brown, but that really is it’s main advantage other than cooking quickly. Eating it actually uses up the body’s stores of vitamins and minerals rather than replenishing them.
I now buy organic brown basmati rice and soak it before I want to cook it. It takes a little more planning but cooking is then fairly easy.You need a minimum of 30 minutes soaking. This can leach out the nutritious goodies though, so the best thing to do is quickly rinse the rice under a running tap, then place in a bowl and add the water – one cup of rice, 2 cups of water. Once you’re ready to cook, pour the rice and water altogether into the saucepan, put on the lid and bring to the boil, then reduce the heat and simmer. Most of the nutrients in the water will then be absorbed back in to the rice as it cooks. With the lid on, the water goes in to the rice rather than be evaporated and once it’s all absorbed, it should be ready to eat – slightly firm and nutty.
Vegetable coconut stew recipe – serves 4 (or 3 if there’s 2 hungry boys nearby!)1 tsp oil
2 – 4 green cardamom pods, depending on how much you like the flavour
cinnamon stick
1 sliced onion
2 tsp chopped fresh ginger
Green chillies, sliced – this will determine your heat (see below)
2 potatoes
1 – 2 carrots
big handful green beans
peas or sweetcorn (optional)
1 sprig curry leaves
approx 200 mls coconut milk
ground pepper – white if you have it
salt
water
To be super duper healthy, scrub the potato and carrot and boil them until nearly cooked. Steam the green beans. Retain the cooking water from both. Chop the vegetables into bite-sized pieces.
Heat the oil and fry the cardamom pods and cinnamon until the aromas are released then add the onion, ginger and chilli and cook until softened. Add in the cooked vegetables and fry for a few more minutes so they absorb the flavours in the pan (you can put in raw veg at this point and fry, then cook, but I find the coconut milk splits and spoils, hence why I cook them first). Add peas and/or sweetcorn if you’re using them and pour in some of the retained vegetable water, curry leaves and stir in most of the coconut milk so you have a fairly fluid stew. Leave to simmer for 5 minutes or so, but watch it so the milk doesn’t split. Add in the pepper, a pinch of salt and finish with the last of the coconut milk so it’s lovely and white.
Interesting facts about green chillis:
I like a mild chilli flavour, but am not at all a fan of a strong, burn-the-lining-of-your-mouth sensation that you can get with some. The problem is you never know quite how strong a chilli is going to be. Obviously there are different types of chillis, and ones like the birds eye chilli is known to be a head blower. So it’s really down to taste and pot luck how much chilli you put in a dish. For this one, I used two as my son was eating and does not like a spicy flavour – just sliced down the middle and the seeds removed, leaving 4 halves to permeate their flavour through the stew.
Chillis are actually remarkably good for you, being high in beta carotene, vitamins B, C (six times more than an orange) and E as well as iron and potassium. The active chemical, capsaicin, that gives chillis their heat has many health benefits including dissolving blood clots, treating wrinkles and facial twitching and can burn calories by increasing your metabolism. It also releases endorphins that can relieve pain and put you in a good mood – it’s an active ingredient of some arthritis treatments and creams.
So next time your mouth is on fire, your nose running and steam is coming out of your ears, remember it’s good for you and enjoy!!!